
This is a guide to dye you chuck taylor allstars. Most other guides I looked at were not very helpful. If you follow the guide and avoid my mistakes you should be happy with your new colored shoes.
MATERIALS:
Chuck Taylor Shoes:
I bought a pair at a DSW that were cheap and fit my feet but had a pattern on them I was not fond of. The pattern looked like the picture above with the logo repeated all over in shades of grey. I actually bought low tops and didnt think to photgraph them before i started.
RIT DYE:
In order to alter the shoes I chose black hoping to get a uniform color. The box warns you this is impossible and they are right.
SALT:
Required by the Dye
DETERGENT:
Required with the Dye I chose Arm & Hammer Perfume and Color Free
Hardware:
Gloves: so you dont dye your skin
Large Pot: for dye preperation stainless steel is your best choice
Large tub or bucket: for dyeing process
Electrical tape and petroleum jelly: for shoe prep
Dying and Drying Area: Area with paper to catch drips and spills.
STEP ONE: Preperation
- Assemble Your Materials
- Prepare Work area by laying down paper
- Read dye instructions, you are going to stove top dye
STEP TWO: Shoe Masking
- Lightly grease the the soles of the shoes with the petroleum jelly *
- Tape over the soles using the electrical tape. Toe Area First then around the perimeter of the shoe. The photo at the right was taken late but the tape is the shiny bit on the toe.
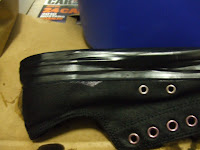
- Jelly and Mask any other parts you want to preserve. The lace rings will change to purple so you may ant to grease them.*
- Soak the shoes in cold water until saturated
* I did not do these steps and got a few stray marks on the soles and purple lace grommets
Step Three: Dye Prep
- Follow the Dye instructions to heat and prep the dye.
- You may only need half the package.
- Transfer the hot dye to your dying tub
STEP Four: Dye the Shoes
- Place both shoes in the tub.
- If you can only fit one dye each for ten minute stints rotating several times until final color is reached
- Remeber the shoes will looker darker wet than when dry.
- Move shoes to drying area. Place them upside down to prevent drips onto the sole rubber.


STEP Five: Drying and touch up
- Let the shoes dry completely
- In several places arounfd the sole the glue the manufacture uses may have prevent the dye from reaching the material as in the photo. I touched them up with a sharpie pen.
Finished Product
The shoes after two and half months after the dyeing process. Notice the pattern still shows through.


No comments:
Post a Comment